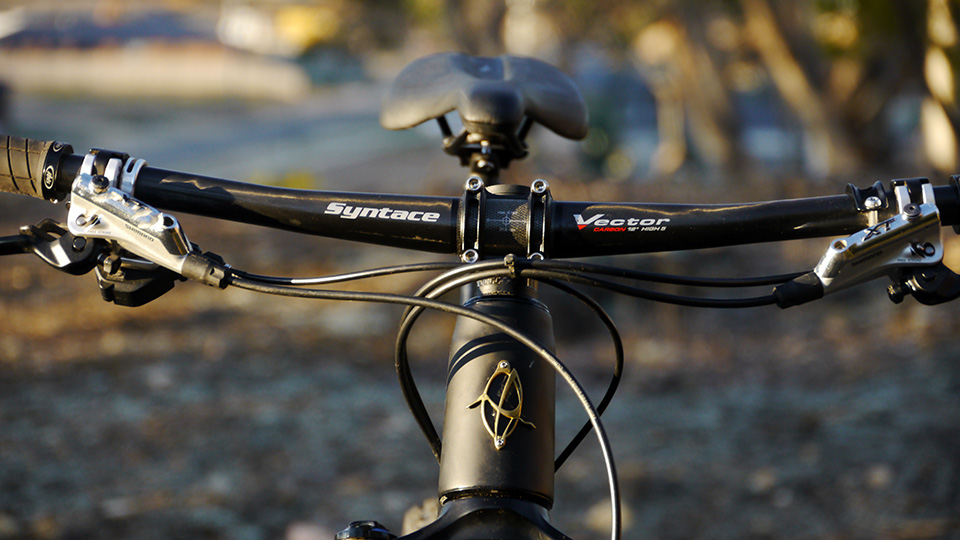
I spent a fair chunk of time considering the line routing on my Mojo HD3, especially since we run brake controls ass-about down under compared to the USA, Canada etc. The HD3 default routing favors, albeit slightly, a USA style brake config.
I could’ve swapped my levers around and retrained my brain to brake with opposite hands, but a very cool thing about how Ibis have implemented the HD3’s internal routing is that with a bit of thought you can pretty much route stuff to suit yourself. So that’s what I did.
Why do brake setups differ on bikes country to country? Glad you asked. I wondered that too.
The routing wishlist for my HD3 included:
- An uninterrupted rear derailleur line
- A fully stealth Reverb line
- Rear brake line in down tube
The port holes were all there. My plan just meant the majority of the port covers needed to be modified i.e. drilled out.
I guess there are a few things to point out:
- Modifying ports like I’ve done won’t be necessary once a full range of ports are available for sale as Ibis parts
- If you run your brakes USA config (front lever on left, rear lever on right) there’s no need or reason to do what I’ve done. It wouldn’t work that well either
- If you run your brakes ass-about like me there’s no need to do it the way I have. The brake line can be routed externally along the down tube, with a slightly sharper bend than it would it have otherwise. I just wanted to do it this way
- Routing options also depend on which side you like to run your dropper remote, if you’re running 1x vs 2x etc
But… if you run a 1x drivetrain, a Reverb Stealth with remote on left, ass-about brakes and are looking for tips on how to route lines on your HD3 you’ve come to the right place 🙂


Mojo HD3 Routing Tips
No need to get fancy with tools. A small torch, length of wire, needle nose pliers and patience is all that’s needed. Remove all port covers so it’s easier to see what the line is doing and guide it if necessary with the wire. Rotate and push the line with one hand, using the natural curve of the line to steer it in the direction you want to go. Use your other hand to shine the torch into the port hole. Once the line is near the exit hole use the wire to fish it out. Use the needle nose pliers to shape the wire as needed.
TIP: One technique that worked well for me was to push the line (in the frame) past the exit port. Then slowly pull the line back, fishing it out just as it begins to pass back by the port.
If routing the dropper post line completely stealth, route it down the seat tube first, then around the bottom bracket bend up to the exit port in the down tube. The bottom bracket bend is easier to navigate in this direction IMO.
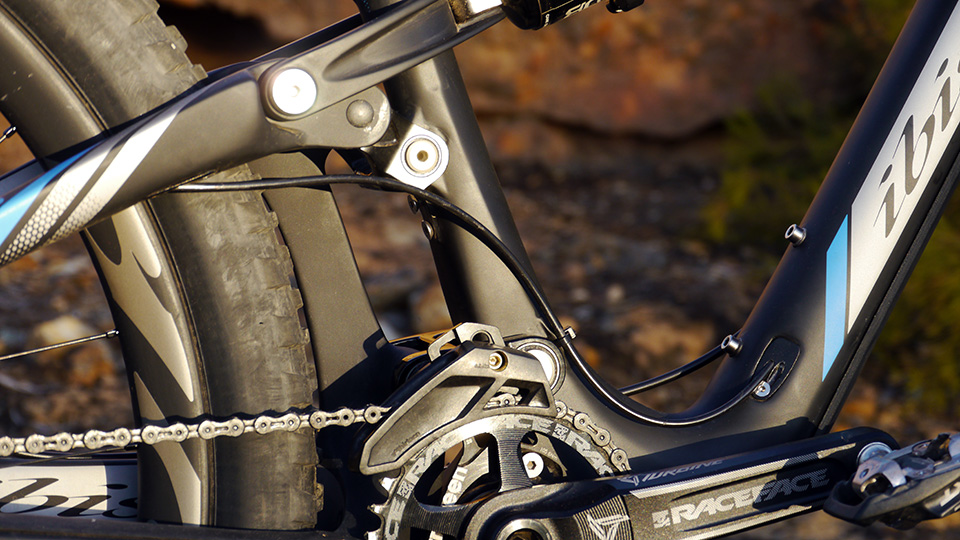
If running an uninterrupted rear derailleur line, start at the top of the down tube then into the rear triangle. The rear triangle seems to be easier to route a line through in this direction.

Modifying Ports
Note: Ibis will be releasing a full range of ports available for purchase in the Ibis online store. Modifying ports won’t be necessary for the most part once this happens.
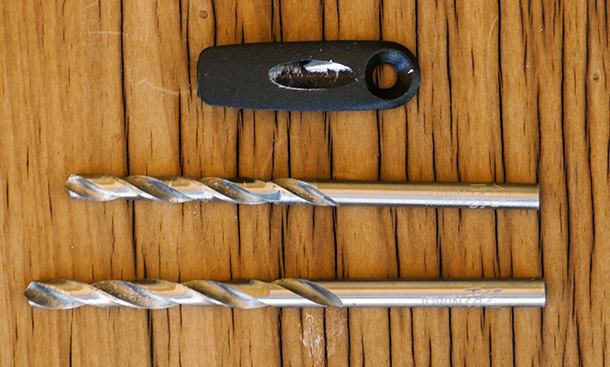
My HD3 routing required drilling out most of the port covers. I bought two fresh quality drills – 4.5mm and 5mm.
Drilling out a derailleur cover plate so it can take an uninterrupted line is only a matter of gently gripping the plate in a vise and drilling out the end with a 4.5mm drill. Use sandpaper and/or a small round file to remove any burrs. You might want to have some black paint or marker pen around to touch up any marks.
Drilling out a derailleur cover plate so it can take the larger hydraulic line is a little trickier. First drill out the end with a 4.5mm drill. Then gradually enlarge the hole in the cover plate with the 4.5mm drill until it is wide enough for a 5mm drill to go in a little way. Change to the 5mm drill and carefully drill out the hole. Just going straight in with a 5mm drill is riskier IMO as the drill will be more prone to catching as it enters the smaller angled hole. Know wot I mean?
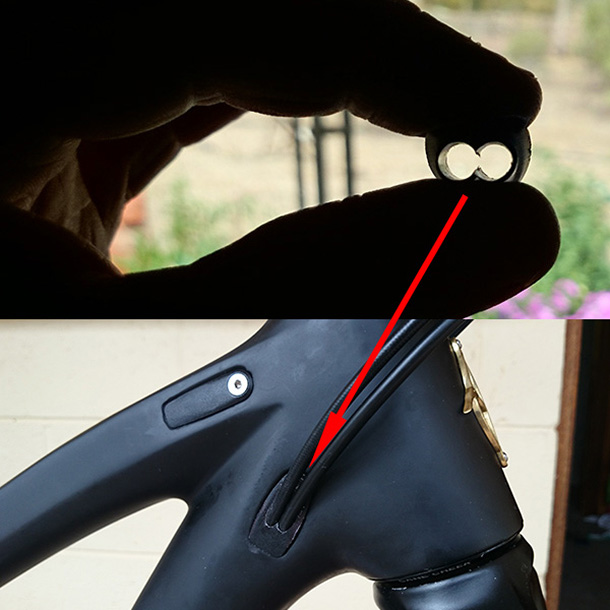
The only challenging modification was drilling out 2x5mm holes in one plate to take the Reverb and rear brake line – pic below. There’s only _just_ enough material for that as you can see. I was pretty stoked it didn’t break!
Hope that helps in some way. Super clean routing. It’s all worth it in the end!